Your cart is currently empty!
Implement Scroll Rate Tracking with Mixpanel: A Step-by-Step Guide
Posted by:
|
On:
|
Understanding user behavior is crucial for website optimization, and one often-overlooked metric is scroll rate. In this guide, we’ll explore how to track scroll rates using Mixpanel, step by step.
The Challenge of Tracking Scroll Events
Tracking scroll events poses a challenge as Mixpanel doesn’t natively provide this functionality. To overcome this limitation, we need to implement custom scroll events. We will explain two methods two achieve that.
Implementing Custom Scroll Events
Regardless of the implementation method, what needs to be done to be able to track a scroll rate metric in Mixpanel is to implement a custom “scroll” event with a “scroll amount” property to know the average percentage of scroll across your website or for each page if you decide to breakdown the metric by page URL or any other criteria.
The scroll amount property, is the dedicated metric to measure the tracking the scrolled distance. This property provides a cumulative sum of scroll data. Implement a strategy of triggering events at specific intervals, such as every 10%. Passing a static number (e.g., 10) ensures the accumulation of scroll data on page.
It is important to avoid the common mistake of passing a scroll amount that is equivalent to the total scroll amount each time the event is fired. For example if we follow the 10% interval rule and a certain user scrolls by 30%, an incorrect implementation would be that of passing the following scroll amounts 10, 20, and 30; As the accumulated total when aggregating the metric would be 60 rather 30.
Method 1: Custom Event Code Implementation
If you decide to track scrolls through the JS SDK, you need to start by integrating the mixpanel.track() function into your codebase. This involves working closely with your development team to ensure an integration that captures scroll behavior at the desired behavior.
// Trigger every 10%
mixpanel.track('scroll', { scrollAmount: 10 });
Method 2: Auto scroll tracking Google Tag Manager
For those using Google Tag Manager (GTM), an alternative easier method exists. GTM can automatically detect scroll percentage and trigger events, reducing the manual coding effort.
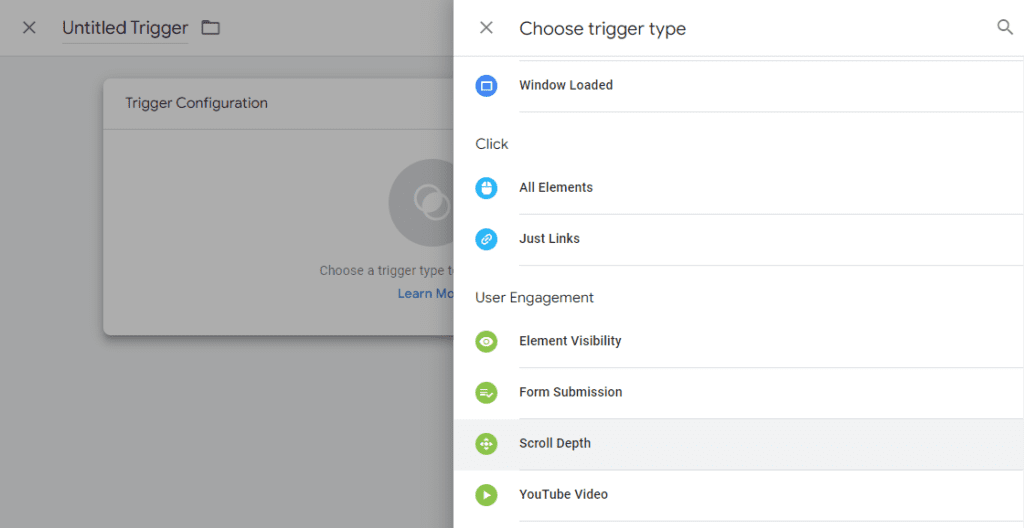
The first step is to set a scroll trigger. So in Google Tag Manager start by creating a new “Scroll Depth” trigger as shown below:
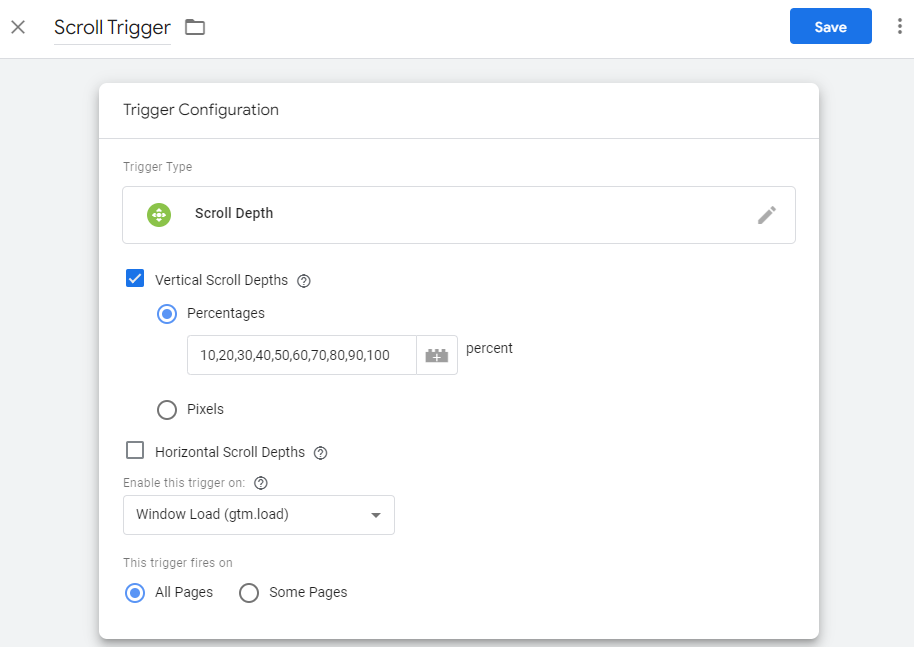
 Then give your trigger a propper name, and configure it with the desired intervals as shown here for the trigger settings. You can set it to trigger on all pages, or on custom pages that you need as shown here:
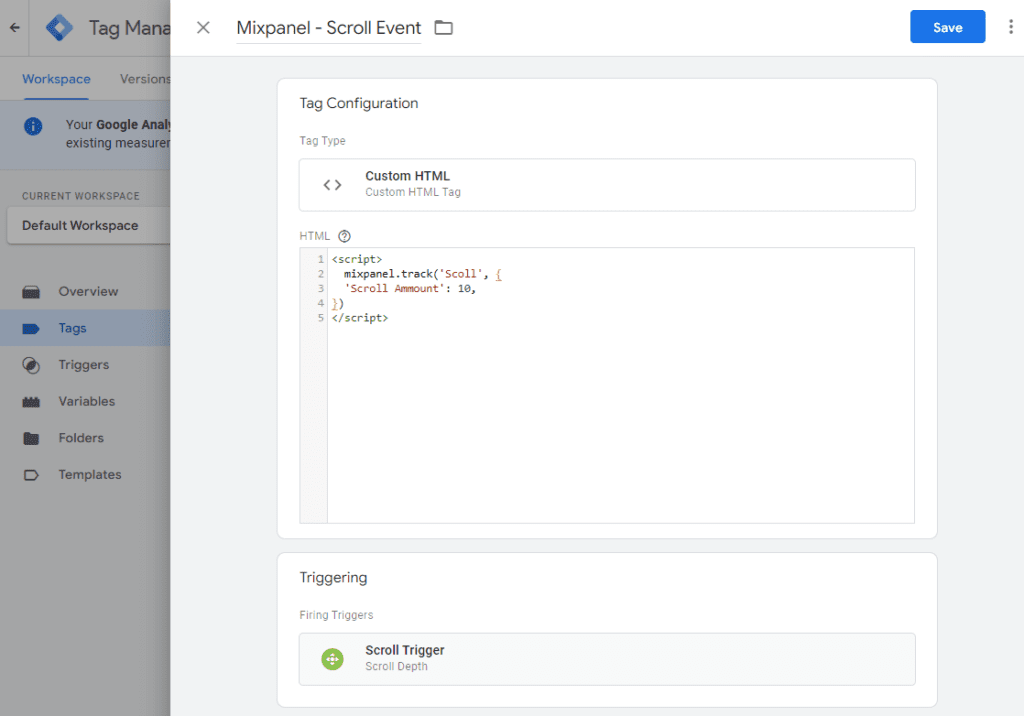
Afterwards, you would need to create the event tag and set it to fire with the created trigger. There are several ways of using GTM to fire Mixpanel events; In this guide we will use a custom HTML tag with the needed JS snippet to fire the mixpanel scroll event.
In the Tags section of Google Tag Manager, click on new, insert the the JavaScript snippet code provided below as shown in the screenshot, and set the tag to trigger on the “Scroll Trigger” that you just created.
<script>
mixpanel.track('Scoll', {
'Scroll Ammount': 10,
})
</script>
Save your tag, and don’t forget to deploy your container
Validation and Testing
Regardless of your implementation choice, you should always validate the implementation across different scenarios to ensure accurate tracking of scroll rates, and most importantly that your event deployment was successful where your data is effectively being collected by Mixpanel.
Use TAGLAB for comprehensive validation and testing. Start by setting up few scenarios with a scroll event to verify that the ‘scroll’ event is firing correctly, and confirm the precise capture of the scrollAmount property for Mixpanel technology. This would simulate various scroll events on pages of your choice at few intervals to ensure that both the event and it’s property are working as supposed.
Data Analysis and Interpretation
Now that your event is implemented and data is flowing to Mixpanel, consider using averages when using the scroll amount property or normalizing it through a formula based on the total scroll amount divided by the number of page views to gain meaningful insights.
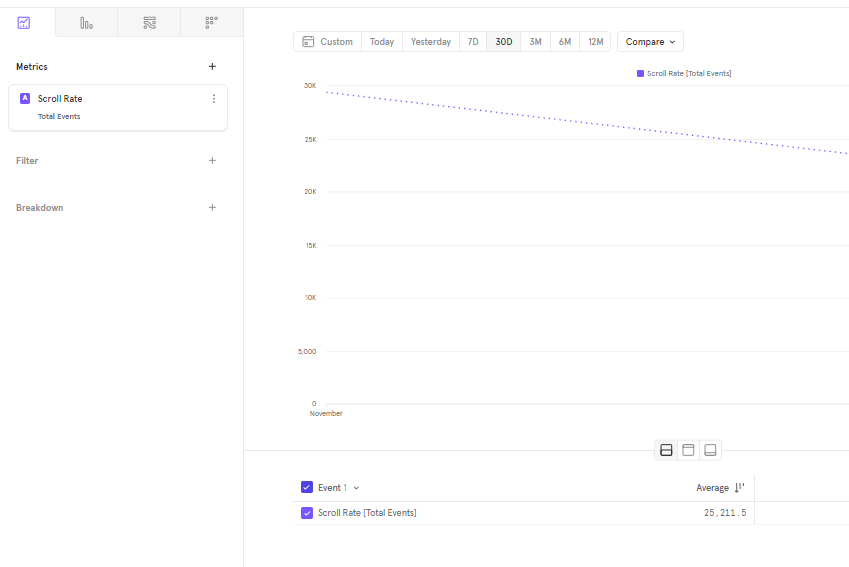
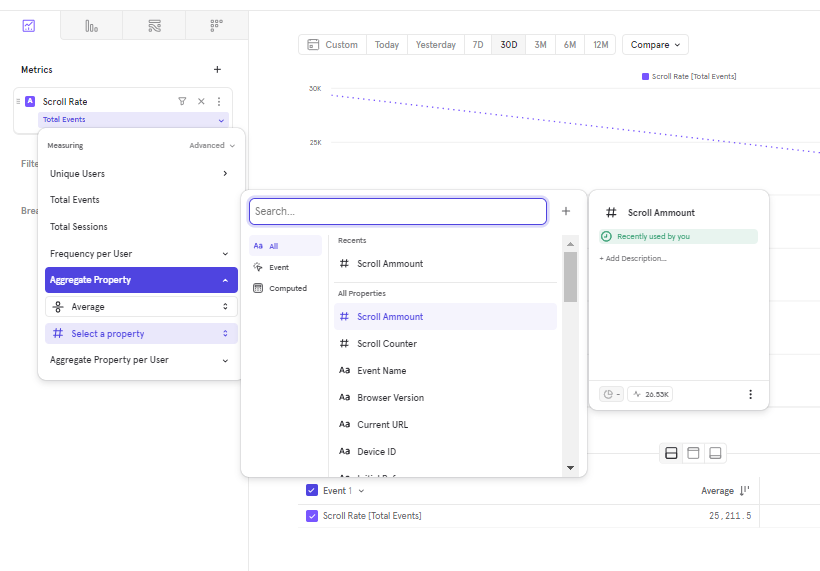
If we select “Scroll Rate” as an event, by default it will show the Total Events count. But this is not the intended purpose for measuring the scroll rate or average page scroll.
 To achieve that goal, it is necessary to click on “Total Events” and replace it with a “Property Aggregate”, then use the average of the implemented property “Scroll Ammount”.
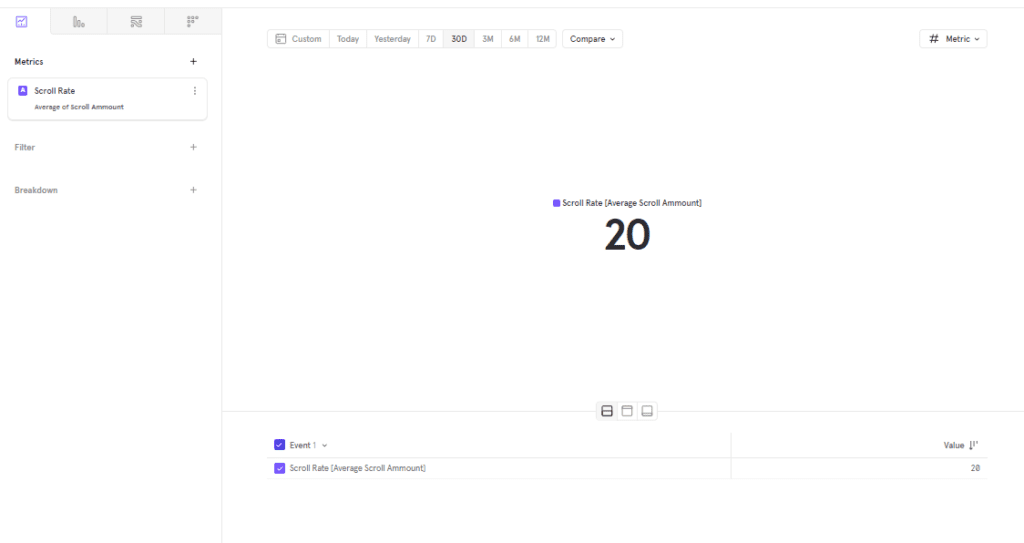
then this will show the effective scroll rate. The result is 20% in this example shown here for the entire website.
 [smart_post_show id=”16588″]